Aim
The aim of this post is
not to give you a detailed insight into java3d, but to explain things very easily (with pictures!) on how to start off so that a complete newbie to Java could make their first Java3d scene. This is mainly due to the fact that I had quite a few issues when I did it for the first time, and that many people are experiencing problems, even after following the Sun tutorials at
http://java.sun.com/developer/onlineTraining/java3d/. I also noticed that some crucial information was missing on-line, such as one of the import statements that you will need to use.
What you need
You will need to have Java3D installed on your computer. This is very easy and quick in
my other tutorial. If you are running Windows Vista you may want to follow my other tutorial
on how to get
Javac to work in Windows Vista, first.
Programming your first Program with Java3D
- * Important Note!This tutorial will tell you how to make a Java3D program even if you haven't got Java3d installed correctly, and will tell you where to skip if you have got Java3D installed correctly. This is due to the fact that when I originally wrote this article, my Java3D was not installed correctly. I have since fixed this problem.
This can be done in a simple text editor such as notepad, or be performed in a programming IDE of your choice. My personal preference is the Netbeans IDE but for training purposes I am going to do it in notepad.
Go to
http://java.sun.com/developer/onlineTraining/java3d/ and click on 'chapeter 1' .
Navigate to page 20 and copy the code shown there.

Paste the code into notepad (or your IDE), and remove all the line numbers.
Navigate to the next code section in chapter 1 on the same page and do the same, making sure to paste the code BELOW the code you pasted in before.
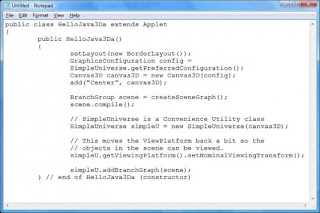
Navigate to page 21 in chapter 1 and copy the first section of code.
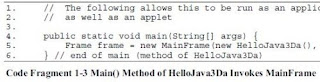
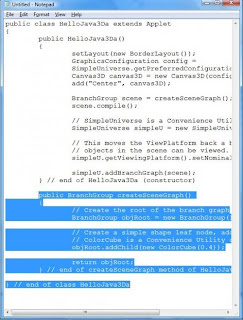
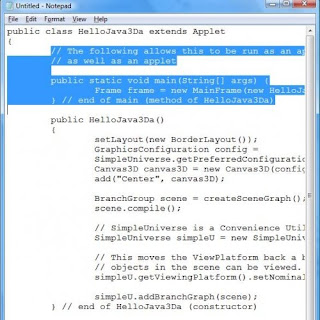
Paste the code into your notepad file after the class declaration but before the first method declaration, as shown below. Make sure to remove all the line numbers once again.
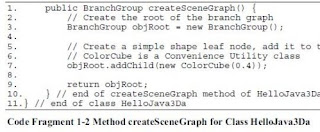
Navigate to the bottom of page 21 and copy the section of code as shown below:
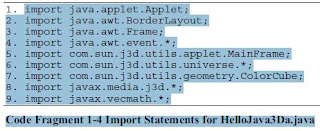
Paste it into your notepad file at the TOP before everything else. (make sure to remove all line numbers)
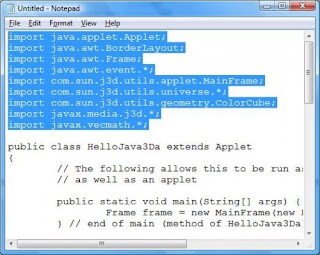
Paste the followig code in the section that you just pasted:
import java.awt.GraphicsConfiguration;
This is an important package that will be needed to compile the program.

Now save the file as 'HelloJava3Da.java'. The name has to be exactly correct otherwise the tutorial wont work. The name of the file is the same as the class name within the file, and it has to have the '.java' extension.
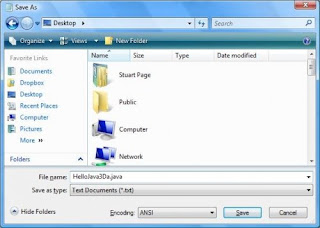
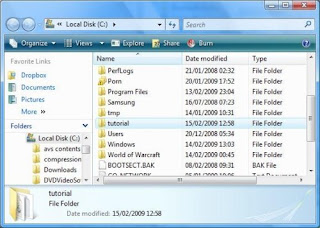
Create a new folder and move the file into an that folder. Make sure the folder is somewhere you will remember. It will make it easier later if you put the folder in your c: directory and name it something easy to type/remember.
- * Amendment! - The steps below untill the next ' * Amendment! ' note are unnecessary if you installed Java3d correctly. This is section is kept for troubleshooting purposes.
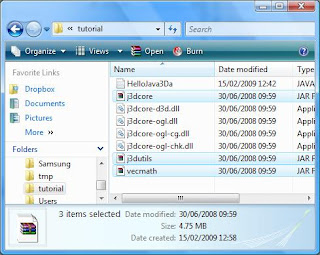
Navigate to your Java3D bin folder and copy the .dll files. Mine is at
C:\Program Files\Java\Java3D\1.5.2\bin
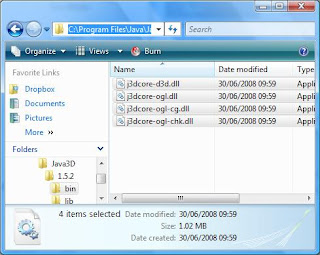
Paste the files into your freshly made folder that you placed 'HelloJava3Da.java'.
Navigate to your Java 3d lib ext folder and copy the .jar files. Mine is at
C:\Program Files\Java\Java3D\1.5.2\lib\ext
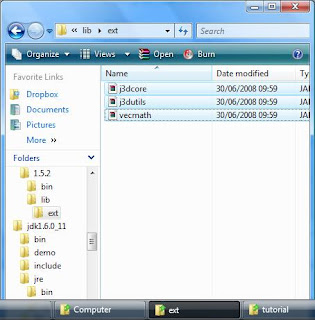
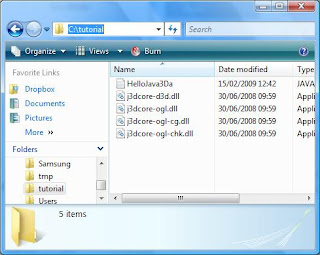
Paste the files into your freshly made folder that you placed 'HelloJava3Da.java'.
- *Amendment! - The above steps may have been unnecessary but the next few are needed in order to run the program.
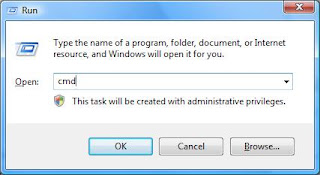
Press start->run and type 'cmd' in order to open up your command pane.
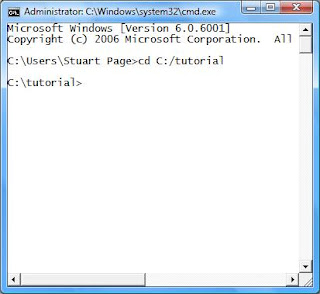
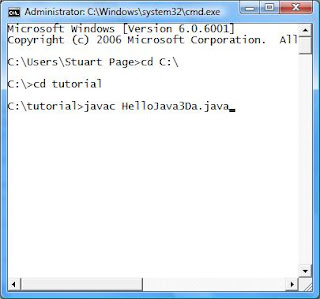
You should now have your command pane open. Type in 'cd' and then the full path to the folder that you put your java file in. My command was ' cd c:\tutorial ' as shown below.
Now that you are in your folder, you can compile your program. Type 'javac HelloJava3Da.java '. You can do this easily by typing javac then spacebar and then pressing tab untill the right file name pops up.
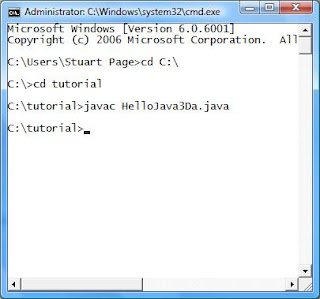
After you hit enter/return, it should appear that nothing happened, as shown below. If you recieved a load of text, then your program did not compile correctly and you should look at the troubleshooting section at the bottom of this post.
Now that you have compiled your program successfully, type into the command pane (making sure that you are currently located in the folder containing all the jar files and the .java file you wrote earlier) :
- For users without Java3D installed properly but have the packages moved to the folder type :
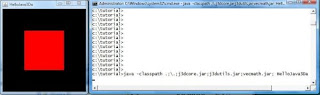
java -classpath .;\.;j3dcore.jar;j3dutils.jar;vecmath.jar; HelloJava3Da
- For users that have Java3D installed correctly and did not need to move the files type:
java HelloJava3Da
This declaration tells the java machine to run the program HelloJava3Da that you wrote and to check the jar files for all the necessary classes specified in your imports in the program you wrote. The ruesult should be a pane that pops up and shows you a red square.
Well done you're finished!
Troubleshooting
If your having trouble compiling and your on a Windows computer and haven't set up 'javac' to work correctly yet, you should get a 'javac' unrecognized error of some sort. If you are using Windows Vista please follow my 'Javac to work in Windows Vista' tutorial.
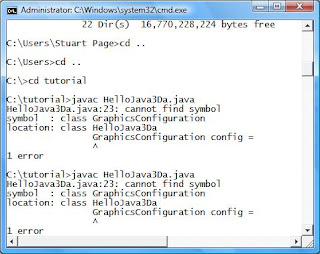
If you get the error like below when trying to compile with 'javac', then you forgot my instructions just before saving the java file.
Paste the following code in the section that you just pasted:
import java.awt.GraphicsConfiguration;
This is an important package that will be needed to compile the program.